Online help for LANMailServer

ClamAV/ClamWin/Clamd with LANMailServer
In LANMailServer settings, you can enable email scanning with ClamAV. To do this, you must install ClamAV.
You need to download and install the software yourself, which requires administrator rights and basic Windows/DOS knowledge.
Install ClamAV
Download the latest version of ClamAV for Windows from https://www.clamav.net/downloads and install it on the computer where LANMailServer is installed.
Do not start ClamAV after installation is complete.
ClamAV is installed to:
- 32bit version: C:\Program Files (x86)\ClamAV
- 64bit version: C:\Program Files\ClamAV
Configuration for clamd and freshclam
To run ClamAV as a service, clamd is required. LANMailServer passes the email to clamd via port 3310, which scans it for viruses and returns a result: infected/not infected.
Configuration files for clamd and freshclam are required. You can download them ready-made:
Administrator rights required: Unzip the ZIP file and copy clamd.conf and freshclam.conf into the ClamAV folder.
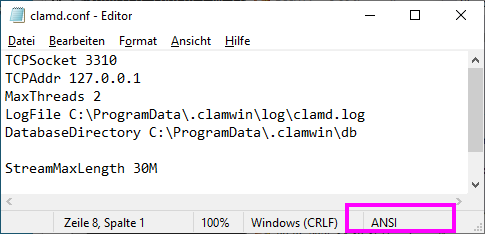
If you want to make changes to the conf files yourself, open them in Notepad and edit them. Then save the file in Windows ANSI format, not in UTF-8 format, which is now the default in Notepad.
Create additional folders manually
clamd and freshclam require additional folders that you must manually create.
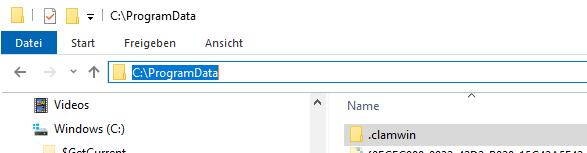
Open Windows Explorer on drive C:\ and go to the ProgramData folder. If the folder is not visible, you must enable hidden folders in Windows Explorer or manually enter C:\ProgramData in the address bar and press RETURN/ENTER.
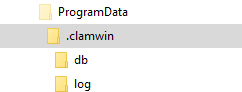
Create the folder .clamwin in C:\ProgramData, and within it the folders db and log, so that the following folders exist:
C:\ProgramData\.clamwin\db
C:\ProgramData\.clamwin\log
Install clamd and freshclam as services and update ClamAV database
clamd must run as a background service so that no user needs to be logged in. freshclam must also run to download virus database updates every 12 hours.
Start Command Prompt or PowerShell as Administrator.
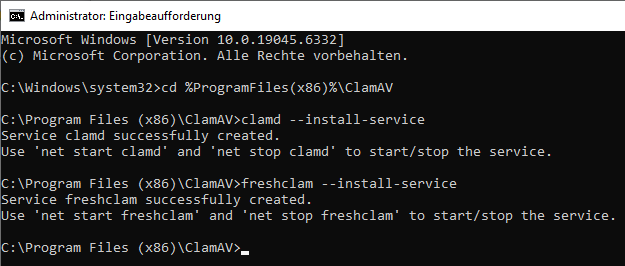
Navigate to the ClamAV folder
32bit: cd %ProgramFiles(x86)%\ClamAV
64bit: cd %ProgramFiles%\ClamAV
Type and press RETURN/ENTER:
clamd --install-service
then
freshclam --install-service
Now perform a download of the virus database by typing:
freshclam
and pressing RETURN/ENTER.
This will download the ClamAV databases. If errors occur, they will be displayed and must be resolved.
Start clamd and freshclam as services
Type and press RETURN/ENTER:
net start clamd
to start clamd,
net start freshclam
to start freshclam and allow it to check for virus database updates every 12 hours.
net stop clamd and net stop freshclam can be used to stop the services. Alternatively, in Control Panel - Administrative Tools - Services, you will find "ClamAV ClamD" and "ClamAV FreshClam" in the list of running services and can stop or start them there.
Maximum size of emails to be scanned
The clamd service supports files up to 25 MB. If larger emails need to be scanned, add StreamMaxLength with a size in megabytes to the end of clamd.conf, e.g. 30 MB:
StreamMaxLength 30M
Be sure to save in Windows ANSI format. You must stop and restart the clamd service after changes to the conf file.
Updates
The virus databases are automatically updated by freshclam, but ClamAV itself is not. For updates, you must download the new version of ClamAV, uninstall the old version, and install the new one.
Manual last updated: Wed, 8 Oct 2025 22:36:23 +0100
Manual as complete RSS feed: Manual as RSS feed
Manual localized with Microsoft Copilot
Created with RSSWriter https://www.rsswriter.de German
 Newsletter Software SuperMailer
 PHP Newsletter Software SuperWebMailer
 FollowUpMailer
 BirthdayMailer
 MONewsletter
 MailboxFetcher
 SuperInvoice, E-Rechnungen
 SerialLetterAndFax
 PHP Newsletter Empfänger Verwaltung SuperMailingList
 SuperSpamKiller Pro
 RSSWriter
 HTTP2Mail
 SMSout
 NetStat4Win
 PersonalFax